Roof Flashing 101
The concept of roof flashing is simple: flashing redirects water that might otherwise find its way into small cracks and openings in your home's roof so that it doesn't damage the roof, ceiling, walls, and structure. Rerouting water can also prevent moisture and mold issues.
Whether you're building a new home or repairing or replacing the roof, properly installed flashing can be crucial to preserving your home's integrity. Prevention of water intrusion is one of the most significant steps you can take to maintain your home over the long term.
Flashing is generally installed around chimneys and pipes, around skylights or dormer windows, sidewalls and in the valleys of the roof.
What's It Made Of?
Plastic or sheet metal -- aluminum or galvanized steel -- are commonly used for flashing, as are composite materials. Sheet metal costs more than plastic, but it's also the most durable material. Copper is another popular choice.
If you go with the less expensive PVC-based flashing, be aware that the exposed parts are subject to wear wherever exposed to direct sun.
Installing Or Replacing Flashing
Repairing or replacing flashing is not difficult, but the homeowner may want to hire professionals for this job due to safety issues involved with working on the roof.
A professional roofer can patch flashing or repair it without much difficulty, either by cutting and shaping sheet metal or using preformed flashing, applied with roof cement or caulk.
Two of the most common ways that roof flashing is installed are as follows:
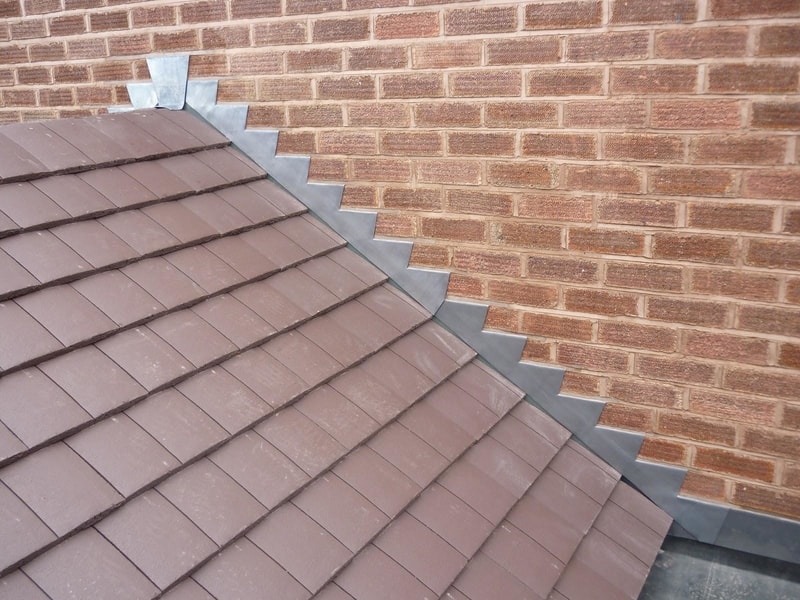
Step flashing. Step flashing is used on the roof wherever the roof meets a side wall, such as a dormer or skylight. It is composed of small, L-shaped pieces, woven into roof shingles for greater resistance to water by allowing a transition from the vertical drainage plane to the roof plane.
Continuous flashing. Just as it sounds, continuous flashing is one long piece of flashing, installed at the bases of skylights, chimneys or dormers.
Uses of these and other kinds of flashing include the following:
Chimney flashing. Continuous flashing is applied along the base of the chimney. Step flashing is applied up the sides of the chimney. Saddle flashing should be installed along the top of the chimney. The installation should also include cap flashing, which laps over the other flashing so that water doesn't seep behind it. Cap flashing should be mortared or caulked.
Skylights. Skylights often have their own integrated flashing. If not, continuous flashing should be used along the base, with step flashing installed up the sides, and saddle flashing on the top.
Drip edges. These are extended lengths of flashing that divert water from the edges of eaves and rakes (the area of the roof that runs from the edge of the eave to the peak of the roof).
Vent pipe flashing. This should be installed around the flange that goes over the roof vent pipe and should extend a good 8 inches upward from the pipe, 6 inches to the right and left of the pipe and 4 inches running downward from the pipe to allow the water to go around it. The bottom of the flashing should overlap the shingles.
Your roof is your most important shield against water damage and mold occurring in your home. Fortunately, modern materials used for roof flashing are much improved over those of a few decades ago, and if installed properly by reputable professionals, should minimize the chances of roof leakage through valleys and around roof structures.